Objectives
- Employ both binary and text file input and output to read and write image files.
- Implement software using multiple instances of inheritance.
- Construct an interactive graphical user interface using event listeners and inner classes and/or lambda expressions.
- Research and implement at least one event listener that is not an
ActionListener. - Handle exceptions in a robust and meaningful fashion.
Overview
In this assignment you will be developing an image manipulation program.
The program itself will be capable of reading and writing in multiple image
formats including .bmp, .jpg, .png,
and .ppm files. The program will also be capable to apply
simple transformations to the image like:
- Converting the image to grayscale
- Producing the negative of the original image
Assignment
This is the last laboratory assignment for the quarter and is partitioned into multiple parts. Specific deliverables are given for two weeks. Your instructor will set the requirements for any additional deliverables. The assignment has been designed to provide numerous ways in which the program may be expanded. Students are encouraged to use their creativity to implement additional functionality beyond the requirements of the assignment; however, it is important to complete the required functionality before getting too carried away.
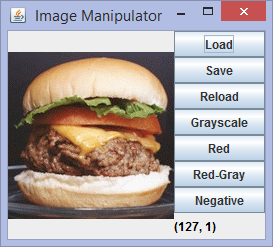
Week 8 Summary
In the first week you must implement the following functionality:
- Load and reload images stored in the following image file formats:
.jpg,.png, and.ppm. - Display the image that has been loaded
- Write images in the following image file formats:
.jpg,.png, and.ppm. The format written must match the file extension. For example, if the current picture was loaded from a.jpgfile and the user entersimage.png, the image must be saved in the.pngfile format. - Use
JFileChoosers to select the image file to load and save. - The appropriate graphical user interface to support the operations listed above.
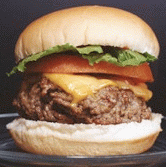
Your program should be able to load this PPM image.
Week 9 Summary
In the second week you must implement the following functionality:
- Load and write images in the
.bmpfile format. - Apply the following transforms to the current picture:
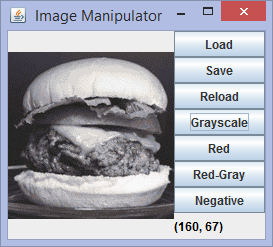
- Make grayscale version of picture
- Make red-channel version of picture (removes green and blue channels)
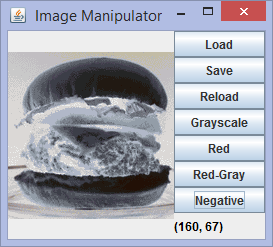
- Make negative version of the picture
- Make red-gray version of the picture
- The appropriate graphical user interface to support the operations listed above.
Details
Loading and Saving Images
At a minimum, the program must support loading and saving
.bmp, .jpg, .png,
and .ppm image file formats. The load button will open a
JFileChooser dialog that will allow the user to select
the file to be loaded. The program will use the extension to determine
the format of the file and load the image (provided the extension type
is supported). Pressing the reload button will reload the last loaded
image from the file system.
The save button will function in a similar manner. When the user presses
the save button, a JFileChooser dialog box will open allowing
the user to select the destination folder and type in the filename and
extension. The program will then write the image to that file using the
file format that matches the file extension. If an unsupported file
extension is entered, the program will display an error message without
attempting to save the image.
You may use the javax.imageio.ImageIO class to read and write
files in the .jpg and .png formats. You must
implement your own code for reading and writing .ppm files.
In particular, you are required to implement the ASCII version ("P3") of the
Portable PixMap (PPM) format. Good documentation for the format is available
here. Note: when
creating a
Similarly, you must implement your own code for reading and writing
.bmp files. The BMP format is significantly more complicated
than the PPM format
(details).
It's evident from the
BMP description
that the header information for these files is considerably more involved
than the header information for PPM files. Also, BMP files are
stored as binary files. As a result, the code to read and write BMP
files is more challenging to write than the code for the PPM files.
You are encouraged to use the provided BMPPicture class
(BMPPicture.java) as a starting point.
The file contains a partial implementation and detailed comments to
help guide your implementation.
Your program should be able to load this BMP image.
Image Transformations
The program will support a number of image transformations.
Grayscale
This transformation converts the image into a grayscale image. If the image is already grayscale, the transformation has no affect. In this transformation, the RGB components of each pixel are replaced with a single value. The replacement value is calculated as: gray = 0.2126R + 0.7152G + 0.0722B (more info).
Negative
This transformation converts the image into a negative image of the original. In this transform, each RGB component is replaced with 255 - original value. Thus, an RGB value of (255, 255, 0) would become (0, 0, 255). (more info).
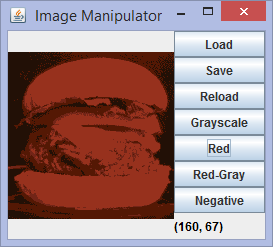
Red Only
This transformation acts as a red filter. The green and blue components of each pixel are set to zero.
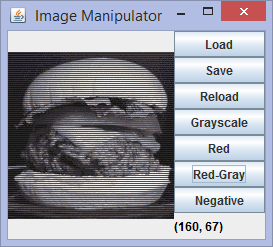
Red-Gray
This transformation is based on an experiment demonstrated by Edwin Land, founder of Polaroid, in 1959 (more info). The experiment was based on the Retinex Theory of Color Vision. This page has a nice explanation of the experiment and the Retinex theory. The transform is quite simple: perform a Grayscale transformation on the pixels in alternating rows and perform a Red Only transformation on the pixels in the other rows.1)
Class Structure
Extensive javadoc for the classes you are required
to implement is available. The Pixel class, which you will use
frequently has been provided (Pixel.java).
The remaining class structure that your program must adhere to is shown in the figure below. Classes above the line must be implemented in order to complete the week 8 requirements. Classes below the line must be implemented in order to complete the week 9 requirements.
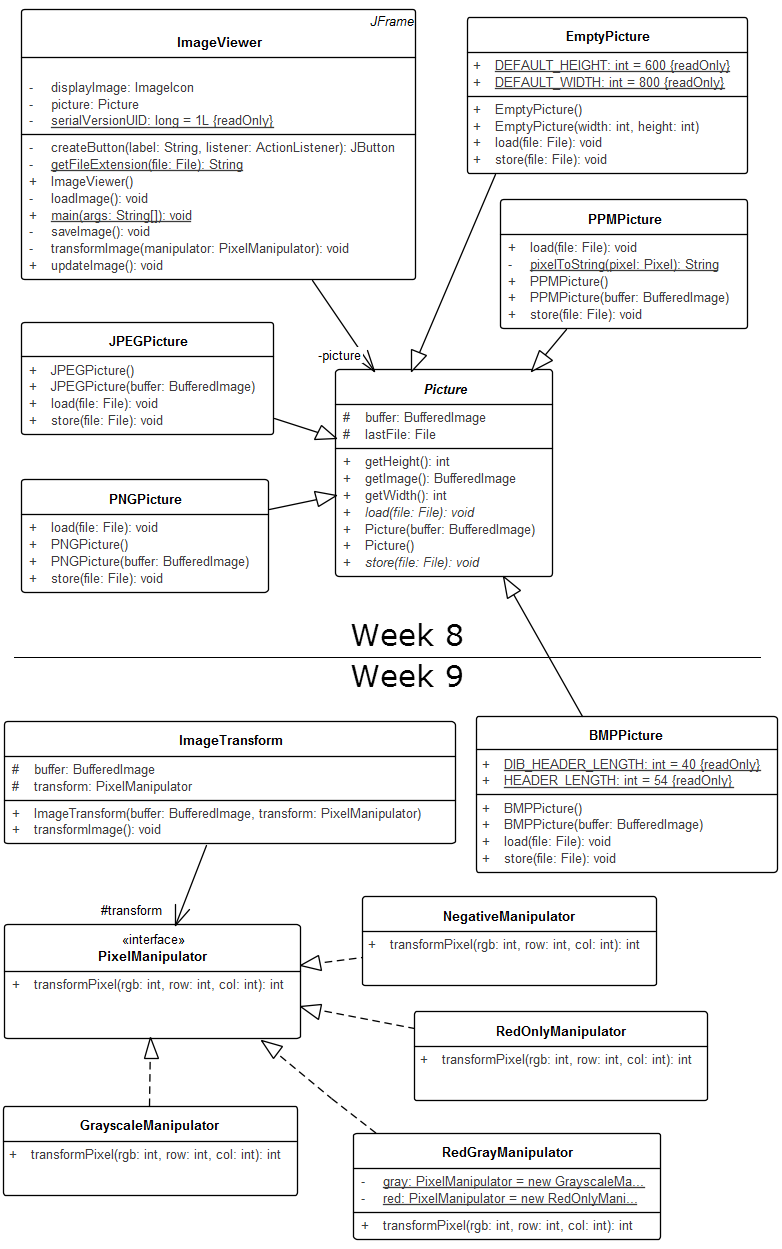
The Picture class is an abstract class
which serves as the basis for the specific picture classes that represent
various image formats.
The PixelManipulator interface provides the basis for building
specific transforms. The various transform classes are used by the
ImageTransform class to perform the appropriate transformation
on the image.
The user interface is implemented entirely in the
ImageViewer class. This includes all of the UI components
as well as event handlers. You may implement the event handlers as inner
classes, anonymous inner classes, or lambda expressions.
Exception Handling
There are a number of situations that could cause your program to throw an
exception. For example, if the file is not found, cannot be opened, or
contains incorrectly formatted data, it is likely that an exception will be
thrown. In these cases, the program should display an appropriate
JOptionPane dialog and log the error.
Your program should write to the log file ImageExceptions.txt.
Beyond week 9
Your instructor may have specific additional requirements; however, all
students must implement a feature that makes use of and event listener other
than an ActionListener. For example, you could use a listener
to:
- allow you to draw on the image with the mouse
- display the x, y coordinates of the location of the mouse on the image
- play a sound when clicking on a pixel with a particular color
- flip back and forth between the image and its negative whenever the window is minimized
- select a region of the image
Extras
There are many additional enhancements that could build on the required functionality. You are encouraged to enhance this application using your creativity. A number of enhancements are included below; however, you should not feel limited to these suggestions.
- Add a menu to the
JFrameto replace (or in addition to) the buttons - Use a
JColorChooserto pick a color (could be used in conjunction with drawing on the image or playing a sound when a particular color is clicked) - Apply a transform to only a selected region of the image
- Display original image and transformed image side-by-side
- Toggle between original and transformed image when mouse button is pressed on the image
- Tonal adjustment (e.g., adding a red hue to the image underneath the mouse)
- Provide undo functionality
- Implement additional transformations
- Apply filters (see here)
Lab Deliverables
See Dr. Rebenitsch for instructions
Dr. Taylor's students: See below
See Prof. Ung for instructions
Acknowledgment
This laboratory assignment was developed by Dr. Walter Schilling and Dr. Chris Taylor.